How To Grow, Protect & Care For Roses
- Plant roses in spring when all chances of frost have passed, or in fall 6 weeks before the first frost.
- Grow roses in a spot where they will get 6-8 hours of sunlight per day.
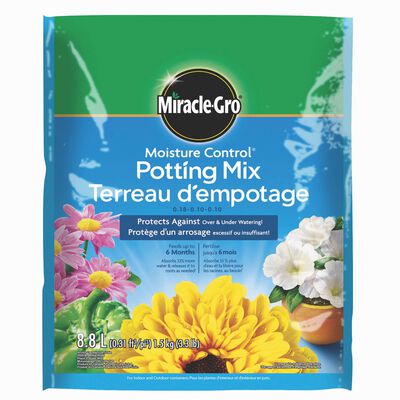
- Improve soil nutrition and drainage by adding Miracle-Gro® Garden Soil Roses to in-ground garden beds, or fill containers with Miracle-Gro® Moisture Control® Potting Mix.
- Roses grow best with consistent soil moisture. Check the soil often and water when the top inch is dry (avoid wetting leaves), or consider installing a soaker hose.
- Add a 3-inch thick layer of mulch around your roses, but avoid placing mulch within 6 inches of the base of your roses.
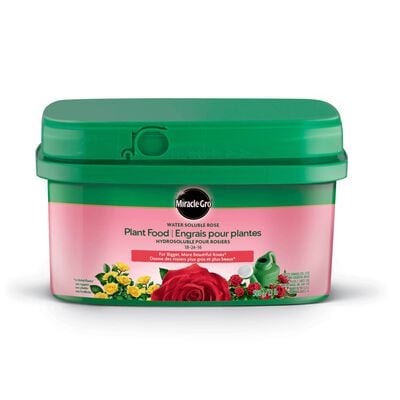
- One month after planting, begin feeding roses regularly with Miracle-Gro® Water Soluble Rose Plant Food.
- Deadhead and prune roses according to the specific needs of the variety you're growing.
Caring for Roses Is Easier than You Think
The last thing you need in your hectic day is a high-maintenance flower in your garden. Fortunately, caring for roses is not as complicated as it is often thought to be. Whether you're working with easy-to-grow miniature roses, shrubs, or the more challenging climbing varieties, a little extra attention to feeding, watering, and pruning, roses will transform and elevate your garden.
Planting Roses
When to Plant Roses
A big part of successful flower gardening is knowing when to plant. The best times to plant roses are in spring after the last frost, or in fall six weeks prior to the first frost. With a little planning, you'll have nature on your side to help your rose-growing efforts pay off beautifully.
Planting Roses In-Ground
Roses crave sunlight and generous helpings of food and water. In most climates, provide at least 6-8 hours of sunlight per day. If you live in a very hot climate, plant them where they are shaded from the hot afternoon sun.
- When you're ready to plant, dig a hole that is twice the size of the container that your rose came in.
Create of 50/50 blend of native soil and Miracle-Gro® Garden Soil Roses, which is enriched continuous-release plant food that will feed roses for up to 3 months.
- Backfill the hole with the soil mixture and water thoroughly.
- Block weeds and help retain soil moisture by adding a 3-inch thick layer of mulch around your roses. Do not apply mulch within 6 inches of the base of your rose plants. And, ideally, the mulch used around roses should be completely replaced each spring to help control disease problems.
Planting Roses in Pots
Lining your porch or patio with potted roses is a wonderful way to elevate your outdoor living space. Growing roses in containers also gives you more control over soil quality, moisture levels, and available sunlight. Here are a few things you should know before planting roses in pots.
- Not all roses varieties are suitable for growing in pots. Avoid climbing roses and varieties that grow tall and wide as they could tip over.
- Consider polyantha, ground cover, miniature, and patio rose varieties to grow in containers. When it comes to container size, bigger is better. Roses like to root deeply, so a tall pot at least 15 inches in diameter is a good start.
- Choose a container that drains because roses do not like their roots to be soaked. If you have a favorite plastic or wooden container that doesn't drain well, then feel free to drill 3-4 1-inch holes in the bottom.
- Roses thrive with consistent soil moisture. Fill your pot with a premium potting like Miracle-Gro® Moisture Control® Potting Mix that protects from over and underwatering.
Watering Roses
Water roses at the base of the plant, and provide about an inch of water per week. Using a soaker hose is ideal for roses because it delivers water directly to the roots and keeps the leaves dry. It's also best to water in the morning, so if the leaves do get wet they will have plenty of time to dry.
Feeding Roses
Roses should be fed in the early spring just as their leaves begin to grow. Roses that bloom continuously are hungry and benefit from nourishment, so feed your roses every 2 weeks with water-soluble rose food, such as Miracle-Gro® Water Soluble Rose Food. Or, for a longer-lasting solution, use continuous-release plant food, such as Miracle-Gro® Shake 'n Feed® Rose & Bloom Plant Food, which will feed for up to 3 months.
Pruning Roses
For roses that bloom continuously, removing faded blossoms will encourage your rose bushes to produce more flowers. Snip off the spent flowers below the bloom just above the first leaflet. Since leaves are the energy factories for your roses, leaving the foliage intact will result in more flowers.
Stop removing faded blooms in early fall to encourage your rose bush to prepare for winter. If you grow roses that flower in clusters, like the grandiflora or floribunda types, you'll notice a center bud that tends to dominate the cluster and flower first. If you remove it, the result will be a full floral spray without a hole in the center. Removing the center bud also helps prevent fungal diseases. On the other hand, if you grow hybrid tea roses, removing the buds that form below the flower bud at the top of the stem will produce a larger flower.
For more in-depth pruning info, check out How and When to Prune Roses.
Protecting Your Roses In Winter
Roses need a little time to prepare for winter. Stop feeding them in late summer and hold off on removing faded blooms once early fall arrives. This will encourage them to slow their growth and enter the dormant stage before winter. After a hard frost has caused most of the leaves to fall off the plant, cover the base of your rose bushes with a 10 to 12-inch layer of well-drained compost or mulch. If you live in a particularly cold climate, you can also wrap your rose bushes in burlap or cover them with extruded-foam caps (also known as rose cones) to help protect your roses during the winter. The key is to not cover your roses too early - wait until the temperatures stay cold.
If somewhere along the line you heard it was difficult to grow roses, then we hope this article helped break that stereotype. Roses are a joy to grow—and not just for folks with a lot of experience! And when you're ready to show off those beauties, be sure to share them with us on Instagram or Facebook.

